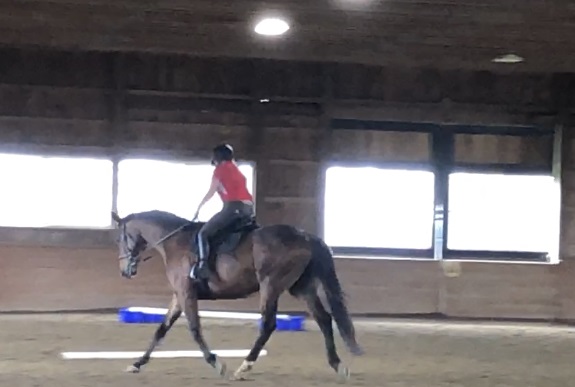
There were so many groups, so many sessions, and so much activity throughout the weekend that it was impossible not to experience at least a little bit of everything. For whatever reason, however, I gravitated to the show jumping ring again and again.
And as a result, there are lots of notes and takeaways haha. The tl;dr version is that if you have a chance to ride with or audit lessons with Peter Wylde, you should. There’s so much information, so many notes, bc literally every single thing about the course itself, and how he wanted it ridden, is Intentional and On Purpose.
Olympian Peter Wylde & Boyd tag-teamed the show jumping demo
Day 1’s riding sessions kicked off immediately with demonstration rides — first with Boyd on Fetiche des Rouges (Radish), then with Peter on Cooley Nutcracker (Bali) — while whoever wasn’t riding provided commentary and insights.
The way they warmed up, put together the exercises, then rode the course was exactly how every single lesson, horse, and rider did it too — everyone from the BN group, to the modified group, to the random non-clinic lessons like with Boyd’s assistant riders etc, young horses, olympic horses, Nox & Lulu, everyone did it the same.
Which, ya know, means you can do it too!
Boyd and Fetiche des Rouges (aka Radish)
It started with warming up on the flat. Now again, the Windurra horses would have arrived at the ring with usually at least 20min hacking under their belts, so adapt accordingly for yourself. But it was virtually the same for everybody:
Peter started the groups trotting forward on a circle in a light seat, not too fussy about the connection to start. Change directions, trot forward. Sit the trot, canter a circle or two — collected to rolling canter to collected, return to sitting trot, canter again, back to sitting, change directions, rinse repeat: sit, canter, canter on, canter collected, sit, canter, sit, post, walk.
The transitions, especially with the sitting trot, were intended to help collect and balance the canter and bring the trot together. The contact and connection were developed through the exercise rather than as a fussy starting off point.
video of the full course
Then it was right into warming up over fences. See the diagram below. Riders started with a simple low vertical (with a somewhat impressively heavy gate as the top element) placed at least 14-15 steps in from the rail so that it can be approached from both canter leads.
warm up was universal — everyone did exactly the same series, including boyd and peter and their other non-clinic lessons with working students and assistant riders etc.
Riders did their first pass on the left lead, which in this course was the tighter turn (larger diameter than a center line turn but smaller than a 20m circle). To Peter, the landing was almost more important than the jump. For many horses, this meant landing and quietly bringing back to walk *before* the turn. Peter likes this first jump to be far enough from the end of the ring that riders have to ride the landing first rather than relying on the wall.
Repeat again off the next lead — which Peter had riders approach from the quarter line rather than the rail, creating a slightly wider turn than the other direction, but still a small enough half circle approach to develop connection and engagement in the forward step.
Peter was up next in the Demo with a schooling ride on Cooley Nutcracker, Liz Halliday Sharp’s Paris Olympics horse
Then with the magic of a jump crew, the vertical is raised and riders do it all over again — really focusing on schooling the landing side of the fence. Jump the jump, then deal with the horse first, then the turn.
The oxer was next, positioned at the other end of the ring on the same line as the first vertical (tho I didn’t see anybody ride the line directly). Same idea with the approaches off each lead, tho for the second trip Peter had riders go all the way out to the rail and open the canter up a bit, before collecting into the corner to make a good straight turn.
warm up vertical
Some horses did more repetitions than others to get the landing right, but basically without deviation, next came the bounces! A simply constructed straight line of low vertical to X to low vertical, 9’ distances, ground lines on both sides of everything, to be ridden off a circle in both directions.
More advanced horses put much more of a curve into their line, like Peter and Bali below, with a main focus on holding the correct lead, while greener pairs rode it a little straighter. But everyone basically did it twice on a circle each way. Peter loves this exercise especially for helping develop connection and softness in the flatwork.
warm up bounces, ridden in both directions
Next came the main feature of this particular course design: Peter’s quadruple 2-2-2 line, which is apparently one of his favorite exercises that they use often.
looking tidy down the quadruple 2-2-2 line
This gymnastic grid measures 30’ to 31’ to 32’, with placing poles to the B, C and D elements spaced 8.5’ out. Riders were instructed to ride in collected and connected, land and wait, wait through the first stride to the cavaletti, relax hand over the jump, then wait, wait, etc, down the whole line. Staying straight and steady.
This line is intended to really help a horse understand his footwork, especially helping him bring his hind feet together to push off, while also getting comfortable jumping from a close distance. It’s generally positioned going away from the in gate to help avoid rushing.
distances in the quadruple were 30’-31’-32’, with V poles and ground line boxes for each of the four elements. cavaletti was spaced 8.5’ from each jump except the first (which had no placing pole)
Peter’s preferred construction uses three height elements with a rail and panel toward the top of the jump, and a third rail toward the bottom. Boxes for ground lines, placed slightly ahead of the jump. Heavy cavaletti for the placing pole 8.5’ out, and ~2” diameter / 9’ length PVC poles to create the “V” guide rails.
lovely demonstration of the quadruple line by Nox & Lulu!
Alternatives could include just using 3 elements instead of 4, tho the length of the line is really the main point of instruction bc jumping in too hot will catch up with you. You could also do three oxers instead, and maybe add 1’ to the distances between (tho keep the cavaletti the same). Peter also likes using lines of 5 or 6 bounces especially for horses that are tricky on the flat.
Peter advised always starting with a low height bc it’s a LOT to jump into!
He likes using the “V” poles for basically everything (obviously) as a straightening device, and says they can often be just as effective on the floor too, or even on the landing side — tho he advised placing them at least 6-10’ back from landing so horses aren’t stepping all over them. The idea is to passively train out drifting while building the strength to jump straight and square.
For less careful horses, he might rest the poles so that the ends are about 6” above the height of the rail, with a gap between them as narrow as about 18”. In the gif above, that would look like bringing the poles to the inner edges of the red bands instead of the outer.
picture for my own benefit — basically two full steps from the cavaletti to my feet here, then slightly plus 1’ to the ground line box, which is itself pulled out slightly ahead of the jump
Anyway, from there, the next schooling exercise was to put the first line together — starting with the same oxer riders warmed up over, then bending in a patient 7 strides to a vertical jumping into the corner.
Peter said he likes to set a lot of distances that are about 3’ short, and especially likes starting and finishing his courses with shorter distances to help the horses not anticipate or spool out. Again, everything is all about the little details.
this oxer doubled as a warm up jump, and as the first jump on course — bending in a short seven to the vertical
For most lessons, the riders did this line at least twice — starting from the right lead, then rolling through a polite and organized turn on the landing to come back down on the left lead — letting the canter open a bit on the long side before collecting again — to jump the line a second time, this time walking in a straight line on landing into the corner.
straight to the corner! no cutting in, finish riding the landing before the turn
The important detail in these polite landings is the smoothness, to show the horse the improvements not by roughing them up, but by calmly and firmly asking for just the one answer: walk in a straight line before the turn.
Peter advised that the worst thing you can do is have a tantrum on a sensitive horse here… which like. Yea, I can see that LOL. But that doesn’t mean you can hide from the issues either. You have to confront them, and help the horse understand the rideability on landing.
second line on course, another oxer right bend, this time on a true 12’ stride in seven
The idea is that if you start your ride by focusing on those little details, the course should basically put itself together. Riders started again with the same first oxer bending to blue vertical in a patient 7 strides, then down the quadruple 2-2-2 gymnastic.
like so!
Then onto the next bending line, this time actually set to a true 12’ stride but still in seven. For folks who might be interested in setting this up at home, but who would prefer to have both a right and left bending line, you could square that turquoise oxer instead of putting it on the diagonal to change that bend from right to left.
then a finish down a triple combination again set on slightly short “comfortable” distances
The course finished down another combination set on distances that were all about 3’ short, again to help horses learn not to keep snowballing as the course goes on. And riders were instructed to finish their circle politely. As with every other line, fix your lead, fix your canter, as if you intended to keep going.
An alternative construction could include a 5-1 oxer-vertical-oxer instead, which is apparently another of Peter’s favorites for practice. He said he sometimes likes putting a liverpool at the A element jump to force riders to ride forward into the line even tho the distance is short.
sketch of the full course, lmk if you want any additional details
Overall, Peter described his training approach and course design to be all about helping horses and riders avoid the round snowballing out of control. Sometimes he’ll use cones in the ends of the ring to cue walk transitions in the middle of a course, or maybe he’ll plop in a trot jump like you’d see in an equitation round.
But basically, he wants riders to be able to create a transition at any point in the course, to break up the building adrenaline, and develop tools and techniques to prevent desperation. “Develop” being the operative word there — rather than “demand.”
Personally, I can’t wait to try setting some of this up, and practice some of the techniques and approaches from these lessons. But ya know. Rehab comes first… so in the meantime, maybe one of you will give it a shot and let me know how it goes?
An overwhelming proportion of traffic across this modest little blog these days is non-human. Bots, crawlers and scrapers out mining data to power the next generation of LLMs, no doubt.
It’s always interesting to see which posts and pages are getting swarmed, tho. Not that there’s any rhyme or reason to it — but it’s sorta like a random magic 8 ball surfacing an ever changing array of old thoughts, memories, experiences, etc from the archives.
haven’t taken many new pics lol so instead enjoy this festive pony sticker that came in a care package from a friend!
I like to click thru and reread old posts anyway, and the sorta ‘random’ nature to the bot traffic often brings up long forgotten stuff. And sometimes there’s inspiration to be found! Like when a lesson recap from almost exactly 6 years ago popped up, describing the “anti-grid grid” we’d practiced in a jumping session!
pic from back in january, pre-storm, last time we jumped a couple little jumps
It immediately struck me as something we could try even within the confines of the narrow but long indoor! Because real talk, guys, I really have not done a ton of ‘proper’ course work with Doozy, and admit to avoiding a lot of related distances of the 4 to 6 stride variety.
Ymmv, but to me it seems like shorter combos — your typical gymnastics or grids — are more intuitive to the horse, and harder to miss on the striding. Longer lines — think 7-8+ strides — are more forgiving of variations in the horse’s stride length, aka easier to add or leave out a stride. But that middle distance, which is naturally most common in competition, kinda wants more commitment lest you end up on the half stride.
finally set a little mini course this weekend tho. pic not to scale, but was a pleasant little assortment of options! distances: 21’ for the in-an-out one stride bottom right corner; ~55’(ish, I didn’t exactly measure) to the blue oxer
We really haven’t jumped much at all since our last competition in November, either. There have been a couple lessons — notably the two gymnastics clinics with Sally, and also the Loch Moy lesson with Dan that I didn’t really write about but was fine — but otherwise we’ve mostly just dinked around occasionally with whatever was set up in the indoor. Usually singles, and sometimes some bounces.
simple cross rail (illustrated in pink in the sketch) off one diagonal
The weather this weekend was gorgeous, tho. And with Doozy being in a notably placid and serene mood (LO-fucking-L), I was determined to actually set stuff up intentionally and ride it.
Starting with, naturally, the anti-grid grid of a bi-directional 21’ one stride to ~55’ (sliiightly short 4 stride). And a few singles to facilitate cruising flow and easy changes of direction.
bn vertical off the other diagonal (red in the sketch). can also see the bending line to the swedish oxer behind doozy. generous ground lines on both sides since this was our tallest jump.
Nothing crazy, obviously lol. The biggest thing height-wise was a barely-BN vertical with out-to-there ground lines and big bright fluffy flower fill to help give lots of definition to the jump for Doozy. The swedish oxer was maybe a titch larger than you’d expect to see at starter level, esp in base spread, but certainly inviting for BN.
Nbd tho. Indoor course work unsupervised after a relatively quiet season does not have to be balls to the wall, all out, amirite? And also real talk: for the last two competition seasons I’ve kinda gritted my teeth and gotten almost all of our jumping done solo outside of lessons. It was what it was, no regrets or anything, but it’s not reeeally how I’m hoping the year ahead will go for us.
swedish oxers are so versatile and are more inviting to ride off both directions than square oxers. generous ground lines on both sides.
A big priority this coming year will be more jumping lessons, have no fear. But ya know. In the meantime, why not have a little fun, right?? RIGHT lol.
Doozy just loves to jump. I wasn’t sure if she’d be wild or explosive or make bids for the fences after so much gymnastic work in recent months… But honestly she felt SUPER in her connection. She seems to thrive with a steadily closed leg, hip to heel — think: “hugging” the horse — matched with a firm but not dead-weight rein contact — think: feeling the bit move, vs a dull grip.
She has such a natural desire to push forward that the jumps seemed to come up comfortably if I could maintain my end of the connection.
set of 2’3 verticals for the in-and-out, 21’ distance for a more compressed one stride. flowers centered directly under pole for riding in both directions. no extra ground lines bc i was a little lazy, but it was nice test for us to not always have ‘training wheels’!
We did have one moment of getting inverted — our classic ‘face-full of Dooz ears’ move — traveling across the long bending line from the vertical to the swedish the first time, but honestly it was my fault (obvi), I needed to trust that we could wait for the stride **without** shortening or pulling back. Came back around and trusted it and Doozy kept her shape, good girl.
And actually the anti-grid grid was so perfect for this. The 4 strides felt blazing fast, dear god, even tho I set it a little short. But it rode great every time — in both directions, oxer to in-and-out or other way around. So it was good for me to remember that feeling too, esp after months of riding in the indoor where it’s easy to get under powered and off the stride.
the whole line can be ridden both ways, 1 to 4 or 4 to 1; can also catch both ends as bending lines to the earlier diagonal elements: X to in-and-out, or vertical to swedish. i didn’t try to ride the other way — jumping into the line then veering onto a bend — tho you could do that too
All in all a productive session, but also, ya know… Just plain fun LOL. And a good experience of just going out and doing it and not ‘overthinking’ it too much, as Dan would say.
Tho ya know. Now that things are thawing out and temps are climbing again, obvi we’re already starting to get eager for the next fun adventure opportunity! Hopefully soon to come!
I was browsing Maryland Saddlery tack shop & consignment the other day — as a proud owner of a new-to-me dressage saddle, it’s time to complete the kit, right??
More on that later tho (hint), bc while I was there a sales associate directed me toward a crate of free horse-y themed books. And there was some fun stuff, including this little gem that came home with me!
Basic Coursebuilding by Maureen Summers, illustrations by Carole Vincer
Basic Coursebuilding was originally published in the UK in 1991, with several reprints over the years. It’s a thin lightly worded but beautifully and insightfully illustrated guidebook on the construction and design of safe, educational and fun show jump exercises.
contents
Course construction and design is one of those topics that becomes increasingly intuitive with increased experience — the more you jump, the more you understand what makes a good jump (or combination) good. And as such, there isn’t necessarily anything “new” or unexpected here.
philosophy: keep it safe and fun
But it’s excellent reference material — just thru the illustrations but also the accompanying text. I personally really appreciated this note on jumping at home. How often have we seen it happen that if someone has limited resources for their equipment (esp when it comes to building xc jumps), they opt for something a bit aspirational size-wise, or something “spooky” to desensitize the horse.
You know it when you see it too — a schooling field with a collection of somewhat rundown, hodgepodge jumps, and then one jump that’s nice but completely out of proportion to the rest. This author’s philosophy seems to instead focus on a schooling field that keeps jumps approachable and confidence building.
excellent illustrations
Safety takes up a huge portion of the book, especially as it relates to arranging filler material in ways that improve the horse’s perception of the jump.
best practices with clear reasoning
Again, while much of this is maybe “known” to most jumping riders somewhat intuitively, the author provides clear reasoning and logic that helps us as riders better understand risks.
Like with the leaning gate above, or using heavy unyielding standards for the back rail of an oxer (top right — this guide book clearly pre-dates innovations in jump cups like the quick release safety cups that are now required for all back rails).
handy distance guide!
I also personally love the little reference chart for selecting optimal distances in combinations based on height of horse, type of jumps used (vertical, oxer), and arrangement of those types. Similar charts exist in the eventing guidebook, and I actually really appreciate that they explicitly call out the specific arrangements and distances that are ‘not used,’ ie not great design.
guidance on horse-first design
Since getting into eventing, where safety is perhaps the most front and center of all jumping disciplines, it’s been interesting to learn how a rider perception varies dramatically from horse perception. Like the jump on the left, that may appear imposing to a rider but is actually more easily understood by the horse than the plank jump on the right.
how to make room for lower-consequence errors
The book also reviews the somewhat cascading nature of errors around a course — especially when related distances are involved. You might have an error at one fence that you pay for at the next. By adding an extra stride length into the combination, or arranging jump types thoughtfully, the designer can help ensure that a mistake isn’t catastrophic.
I’ve also heard this thought process used when explaining the relative rarity of 3 stride combinations, esp on cross country. They aren’t explicitly forbidden (and in fact I’ve personally encountered them plenty of times), but there’s a perception that three strides is long enough to get on a bad half stride (vs a shorter gymnastic distance that gives you fewer opportunities to alter stride length) but short enough to not have much room to save it.
you’ll see a very similar graphic repeated in most guideline / rule books
Graphics like the above are also super useful in kinda just reinforcing what you might already sorta know intuitively about building the jump itself. Like say, if you wanted to introduce a new piece of filler material, or a liverpool for example, you’d want to start by arranging it in the easiest configuration possible so that the horse is likeliest to have his best most comfortable jumps.
ta da! a lovely flowy test for horse and rider!
There’s also a whole section on plotting out a course on paper, including how to make choices about orienting the start and finish lines proximally to where the judge sits, and also how to prepare the various metrics and measures the judge might need.
But overall it’s a super cute book with nice reference material that I’m happy to add to the library. It’s interesting to see what’s changed in design over the last 30 years - for example, the new quick release safety cups, advances in how horses perceive color (they are red/green color blind) and contrast, and the role decorations play in helping horses read the full height and spread of a fence (decorate the edges and top spread corners).
That said, tho, not a lot has changed haha — at least for the basics. Anything new to you in the above? Or other tips and tricks you’ve devised for setting up good safe fun exercises at home?
Amy and I packed up our dear creatures Charlie and Punky this weekend to ship out for a cavaletti clinic at Thornridge! And, naturally, proceeded to have our best 'jumping' lesson in a long time at this traditionally dressage barn. Guys. It was incredible!
the scene of the crime
Apparently this is a newer thing they do with boarders, and we kinda just invited ourselves to come along too. Trainer C led the group sessions, and used a selection of ground pole exercises adapted from the book highlighted below.
exercise inspired by Pole Work for Dressage Riders, by Ann Katrin Querbach notes: thick black lines indicate raised poles. everything is bi-directional. purple = trot; blue = canter.
AND! We are super lucky that one of the boarders who rode in an earlier group was able to snap some footage for us, yesssssss! Tho -- sadly, she missed the beginning of our ride so you are robbed of any visual representation of Charlie confronting the existential crisis of hyper-short raised trot poles.
no footage of charlie thru the trot poles, so enjoy this gif of Punky #slaying
He was so good, tho. A little fresh and frisky, and a bit 'up' at finding this familiar arena transformed for the clinic.... But so good.
We started with walking, then trotting around the full ring as a group (5 of us), spaced enough so that we could each trot thru the line of poles you see above with enough room that Trainer C could reset anything that got knocked along the way.
This exercise was HARD. Charlie really really struggled with the raised red/white poles at trot -- often trying to skip sections or just sorta obliterating the thing (even tho he was trying so hard). Then something sorta clicked: tracking left (so, starting with the white poles), he got to the red and white poles and broke to walk then crept thru cleanly. Then the next time -- really sat and managed it at trot.
charles himself, thinking very hard
We changed directions, which I expected to be harder (bc now I wouldn't have the mirror to stare into and keep myself straight), but Charlie actually finally really aced the exercise. Sad to not have that on video.
He still knocked it a couple more times, of course, bc it's legit a very hard (and tiring) exercise for him. But it was exciting to feel him so collected and 'sitting' even briefly.
"would be easier if you stopped pulling the inside rein tho, just sayin!" - charles, probably
Next up was the leg yield exercise, which we again did as a group going all at once. I actually really liked this configuration. It's a pattern we practice at home anyway (coming off the rail then yielding back again), but having the trot poles there as an actual physical landmark really helped Charlie understand.
It's like he saw the poles, and understood what I was asking, but also understood the urgency of having to "get there," and thus made it happen. Our leg yields aren't like, super correct or whatever. But they don't have to be for where we are. As far as Charlie is concerned, he's a genius lol.
final boss: a modified circle of death
Last exercise of the day was a cancer circle, with four poles kinda strewn at random along the circle. Not sure they measured for anything in particular, but we ended up getting pretty consistent striding more or less along the way. One set was far enough apart to be 'basically unrelated' (6 or 7 strides, probably), then it was 4 to 4 to 2 (tracking left).
interpretive dance step #1
This is obvi a very familiar type of exercise for Charlie, but one that bears repeating -- and often. Plus it was obviously so helpful to have Trainer C there, not just bc we needed frequent clean up from knocked poles LOL.
interpretive dance step #2
She reminded me to think more about my outside aids, and probably wanted me to be a little more "dressage-y" vs "jumper-y" in my position (everybody other than me and Amy did the clinic in their dressage tack). But eh. I'm sticking with the "we are weak" excuse for now LOL.
And guys, omg, Charlie was SO TIRED by this point. This was, without a doubt, the most intense and taxing ride we've had since.... Hm, probably the Molly days. Not even just because he was out of work for so long, but bc heavily tactical technical instruction is hard to find, apparently.
what a good boy tho
He persevered, tho. Which was a good reminder to me. Honestly, in our schooling at home, I'm pretty quick to reward a good effort and quit while we're ahead -- before he gets tired. And Charlie, for his part, is usually pretty good about stepping up when it counts -- like at shows when he goes into pure professional mode.
not sure my position met any expectations, but this horse 100% blew me away with his effort!
But it IS good to test the limits of our capacity every now and again. Both to help us expand in our fitness and strength, and also to give us a little practice in digging deep when we might otherwise call it a day.
finishing strong!
And so in this ride, as Charlie became more fatigued in the circle and thus increasingly likelier to break to trot if the distance was wonky, we really had to find our determination to get one fully clean circle to finish on each lead.
It reminded me of the first lesson Charlie had with Dan, where Dan basically scolded me. We were working on trot-canter transitions, where we were only allowed to canter when the trot was where Dan wanted it. And Dan reminded me: "This is hard for him. The longer you take to get there, the harder it'll be to keep going. Get the trot now, don't just go around and around and around working on it." (paraphrased).
So. Anyway. After everybody had sessioned each individual exercise, they put it together into a complete little pattern. As much fun as that looked (and it did look FUN -- and challenging, omg), I opted to skip it. Charlie was SPENT omg.
I also suspect that the horse's sleep patterns have been disturbed lately by changes in his herd... But that's a topic for another day. Suffice it to say -- Charlie had nothing to prove, and had been an excellent pony for a very demanding lesson. Good enough!
so so so so SO TIRED by the end <3
We really loved this lesson, guys. Amy and Punky were super stars too -- tho we already knew Punky is basically a gymnastics savant haha. It's so good to see him back in action, sound, and looking good.
Charlie is looking really good too. All the dressage queens in our group kinda put our fitness to shame LOL, but eh, again, I have excuses and I'm sticking to them. We'll get there eventually!
Anybody else really love lessons or clinics like this? Planning to steal any of these exercises (or all of them??) for your own schooling???
My pal Katie and I made a somewhat impulsive trek down to Marshall, VA at the end of last week to capitalize on the rare opportunity for auditing William Fox Pitt. The clinic was organized by Zaragoza Acres, and held over two days -- cross country at Zaragoza on Thursday, and show jumping at Sprieser Sporthorse on Friday.
Originally these two days were intended to be held in reverse order -- but organizers swapped things around when Friday's forecast called for lots of cold and windy rain. We went down on Friday, and were perfectly satisfied to be seated indoors!
this chestnut gelding Laddie was such a ham, totally photobombed WFP and has #noregrets lol
We saw most groups (except for the earliest), plus sat next to an auditor who attended the previous day and could give insights on each horse and rider pair.
And guys, wow. These were some very impressive riders and horses. It was an interesting mix of professionals and amateurs, and horses ranging from fancy homebreds working their way up, to made schoolmasters - plus a few OTTBs!
behold, my notes -- warm up exercises
I obviously love watching all manner of horses and riders get out there and Do The Things (evidenced by spending so much time volunteering!). But at clinics, my main objective is to glean useful little nuggets that might be adapted specifically for my work with Charlie.
So, here are notes I took throughout the full day of groups, and some synthesis on what it might mean for us in our own approach to jumping.
course work diagrams, also repeated below
Warm Up Exercises
Everyone started by trotting a random assortment of small jumps
First formal exercise was to canter in a normal stride down the outside line, then repeat the same line but adding 2 strides (for most horses, they did the 'normal' in 9 and the 'add' in 11)
Notably, the prelim and intermediate groups skipped this exercise
Next - canter into the same line; gentle halt in the middle; proceed out in canter
Continue in a half circle around to the other side of the arena, approaching a single oxer -- but again, halt before the oxer, then proceed
lunch break tacos were ahhhhhmazing
My Thoughts:
- The adding / removing strides in a line of jumps (or even just ground poles!) is an oldie but goodie that Charlie and I play with often
- Halting in the middle of a line... Ehhh I don't see us doing this. Mostly bc... Charlie has a lovely habit of slipping behind my leg, and I feel like going into a jump thinking about halting on the backside might be a perfect recipe for maybe practicing the wrong thing in that regard
- Halting ahead of a single fence, then proceeding at trot or canter, tho? Absolutely want to do this. We actually practiced a variation of this in a recent clinic; and it's something I want to continue experimenting with in our schooling.
- We tend to get a little bogged down in turns, but the whole point here is to keep going, keep moving forward
- Relating to lead changes in this exercise, WFP said to just get on with it. Change legs or don't, but carry on and let the horse figure out how not to be
- Similarly, WFP observed that you might have to twist over a jump in the show ring, but should not practice that at home -- keep the horse straight over the jumps in this exercise, no twisting
deeper dive into course work and notes
WFP Quotables on Warming Up:
Create a horse and situation where you have achieved enough to go into the show ring and face whatever's there
Stay with him -- don't just go "Lah!" while walking and trotting jumps
You don't need to be "so much" at the trot, take a level off it, for the sake of softness. Quality over expression.
Sometimes you put the hind leg out, sometimes you put the hind leg in!
In canter, more swagger, softer outline, "Angry Canter"
Interchange sitting, interchange half seat, interchange elongating and collecting
Push him around and make him more malleable, less brittle -- not so precious and tight
C'mon, change leg! Don't dawdle, kick and ride!
You're not allowed to hope for the long one, take your time -- whether it's 6 or 7, it's always the same stride
Allow. Not fast but flow
it goes on
Regarding the course work, this often ends up being a bit more granularly specific to each individual horse and rider, IMHO, so there are fewer takeaways to adapt for myself.
It was an interesting set of exercises, tho, and definitely a few turns in the mix that likely would have proven distinctly challenging for me and Charlie -- like short turns to big oxers, for example. Most riders did about 2 complete courses, then went back to repeat whichever line or segment needed smoothing.
damn, Gina!
Not all of that was super relatable, tho it was interesting to see how WFP adapted and adjusted the construction of the exercises as needed. A few upper level horses were kinda surprisingly... not great at compressing their strides, and tended to get a bit close to the jump. Similarly, a few tended to be too "up and down" vs "across" in their style of jump.
For these groups of horses, WFP advocated significant use of more generous ground lines to really help the horse change his takeoff point. He also deployed descending oxers (which you can see in the video), something that kinda caught us off guard at first when we first noticed it.
He used that construction a few times, explaining to Chris (who organized the clinic, and rode literally half a dozen horses throughout the day for personalized WFP instruction on his drool-worthy string...): the Descending Oxer, especially built with a plank as the front rail, can help "go-y" horses realize, "Oh there's more!" and remember to use themselves over the full jump.
made new friends too <3
Overall, WFP essentially preached a message of patient, forward flow. He encouraged riders to make a difference when warranted (see the note on "Just pull the reins!"), then get on with it, and otherwise stay committed to a forward, straight and adjustable stride.
My takeaways are mostly around just being damn freakin eager to get back into some degree of instruction myself haha. A girl can dream! And nobody tell Charlie about me plotting, m'kay? He doesn't need to explore any new and exciting creative solutions to getting out of work lol....
Anyway, anybody see anything here that you want to try at home?